

Everyone’s taken a picture that doesn’t look like what they saw in real life. It happens all the time to even the best of photographers. This is because as advanced as digital cameras are today, they still fall short in comparison to the human eye in terms of dynamic range.
Dynamic range sounds like a rather technical term but in short, it’s the ratio of the brightest area of the picture to the darkest. While our eyes can adjust and our brains fill in information, camera sensors are very limited in this regard. A Canon 5D Mark III has 9-10 stops of dynamic range while cinema cameras such as the Blackmagic 4K get to 12. Some of the more serious cinema cameras like the Red Epic and Arri Alexa go to 14.
Dynamic range is part of the reason why footage on high-end cinema has a more “professional” look but what if you don’t have $30,000? The good news is, regular digital camera sensors are better than we think.
To produce an image closer to what our eyes see, there’s an old trick called “Exposing to the left”, which is basically underexposing the overall scene to not clip or blow out the brightest part of the scene. This is because when highlights are overexposed, the camera simply renders it as white and the image information is lost. On the other side of the spectrum, shadow details are usually retained in the RAW file (within reason, of course) so brightening up shadows in post with RAW editing software like Adobe Lightroom is usually preferred to darkening highlights.

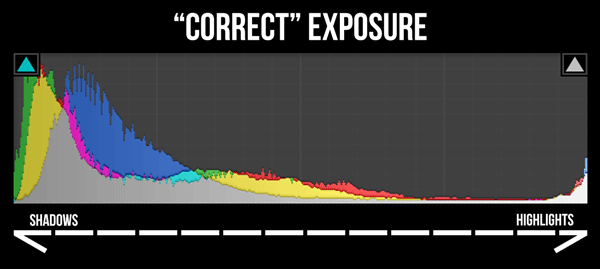
The histogram is a visualization of this idea. On the X-axis is dark and light with the scale getting lighter as you go further right. The Y-axis is the total number of pixels. Since this is a night scene, the peaks are mostly over the dark areas of the histogram.
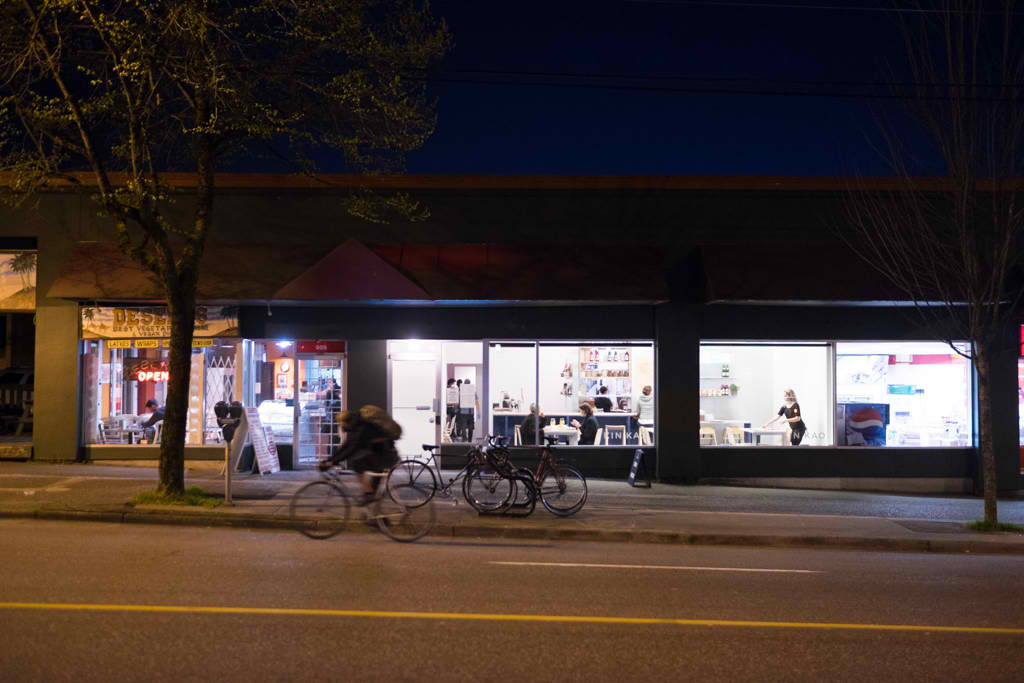
Take this shot I took of the outside of Kin Kao, a Thai restaurant in Vancouver. If I meter for the overall scene, the inside of the restaurant is over exposed since it’s much brighter than the street.
The histogram shows that while all the details are retained in the darker areas of the photo, the highlights are clipped in that they run off the right side of the scale. This means there will be lost information in the brightest parts of the photo.
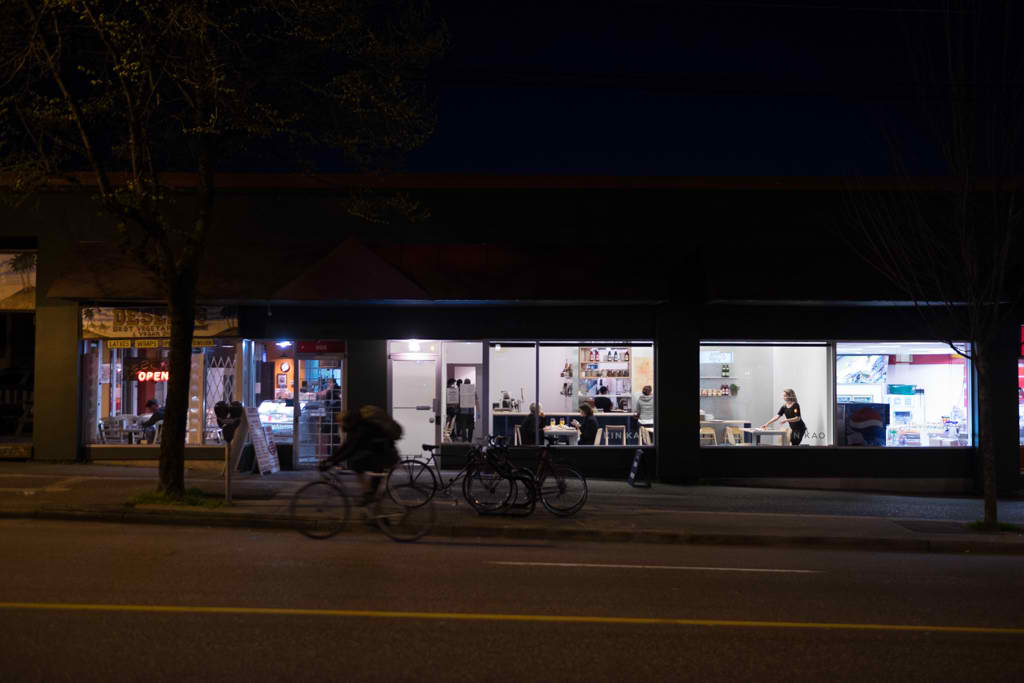
If we correctly expose for the inside of the restaurant, you can see that while there are still some clipped highlights, they are from the convenience store next door, which has much brighter fluorescent tube lighting. However, the detail from the restaurant interior is now in the left third of the chart.
But now aren’t the shadows too dark? Yes, we’ve lost a lot of detail where the shadows are but modern camera sensors keep quite a bit of information when you’re shooting RAW.
And you must shoot RAW in order for this method to work. JPEGs don’t retain any extra information in addition to what you see.

Looking at the histogram for the image above, you can see the shadows are clipped, meaning we can only see black in some areas but if you look at that slightly thicker line at the bottom just above the word “HIGHLIGHTS”, that’s the inside of the restaurant. All the information is still there.

Here we’ve pushed the exposure of the highlights and midtones a stop and as you can see, much of the details that were just black in the image above are recovered. The two trees are the best example.

Here you can see the shadow detail has been recovered and is no longer clipping on the left but unlike the first image which was flat until it got almost all the way to the right, there’s plenty of information representing the restaurant interior.

Using the live histogram on the back of your camera can help you a lot in maximizing your camera’s dynamic range. If you’d like to go the other way, “exposing to the right” to keep shadow detail in an overall bright scene, you just do the same thing but push the histogram peaks as far right as they’ll go before clipping but it seems most modern cameras are better at keeping shadow information than highlights.
Of course, you might be wondering “Why not just use HDR?” Well, the idea is the same except you’re doing it on a single image rather than stacking several. The idea is the same, to stretch the camera’s dynamic range capabilities and preserve details that would be clipped otherwise.
It’s important to keep the effect subtle, though. As you can see in the image above, you never want to go full HDR. Exposing to the left and pushing the shadows results in an image that’s closer to what our eyes naturally see. If you go too far beyond that, it starts to look like a painting rather than a photo.